This page shows tools and where to buy new parts for the Roland Keyboard PCB project.
Tools & Consumables
The list below shows some of the more important tools & consumables used to install the flexible PCB.
- PH2 Screwdriver – Roland JD-800 and U-20 require an ISO 8764, PH2 bit for all screws to avoid damage
- Flat Blade Screwdriver – Removing the key retention strips
- Anti-Static Brush – Removing dust on the flexible circuit, normally these are carbon loaded
- Opened paperclip – Installing rubber contact pegs
- Silicone Sealant tip – Trimmed so that hole is 2.8 mm wide for removing rubber contacts
- Insulation tape – Used to hold PCB in place whilst rubber contacts are put in place or protect areas
- Desoldering Tool – Removing old connectors, pump action is minimum recommendation
- Soldering Iron – attaching connectors to transition board
- Glue – Attaching after touch connector
- No clean flux solder – No clean type avoids corrosive chemicals and does not require washing
- Silicone Grease – Moving parts around keys – do not use petroleum based!
- Isopropyl Alcohol 99%, Lint Free Cloth & Buds – Cleaning contact areas & removing IPA residue

Parts
Rubber Contacts
Rubber contacts can be purchased from an eBay seller, korgpartmaster who provides great service and supplies internationally. They are excellent value considering how rare these contacts will become as time passes.
These are original Roland Parts MPN22185236A0 as used in: JD-800, D-5, D-70, U-20, Rhodes 660, Rhodes 760. D-70 & Rhodes 760 keyboards are 76 note you will need more strips and they sell these too.
They are also compatible with some versions of Rodgers church organs, C-440, C-445, C-505, C-580 , where the Roland U-20 keyboard was used instead of a Fatar assembly.
Example links to the eBay item: United Kingdom and United States.

We examined and verified two sets of these contacts and they are excellent quality. Packaging is important to minimise dust ingress and these are supplied in a clean polythene bag. On our samples, we did not find any contamination or dust, giving assurance of a reliable install.

Aftertouch Sensor White Felt
The top felt on the keyboard affects the feel and noise in a remarkable way. A perfect substitute for this discovered by Jonathan Williams is the “Hammer Rest Felt 1” for a Technics E-Piano. It is for a full sized keyboard so a lot is left over and can be used as two layers to repair the red rest felt underneath.
This part can be obtained from Synth-Parts. Removing the adhesive on the old felt is tricky and a very gentle action is required with a plastic tool.

Here is what you see as the felt is removed from the Aftertouch sensor.

Red Rest Felt
This can be replaced in sections using two layers of the Aftertouch felt. Usually, this is not so damaged and a section can be cut out, making sure that the key rests don’t rest on the join, put two layers of after-touch white felt in that area.
Mainboard Flat Cable
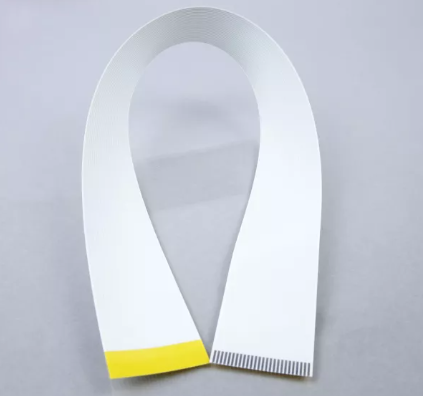
Synth-Parts supplies equivalent flat cables for the transition board to main board connection. It can save a huge amount of work creating a cable set like this Type 2 version here.

It is Type 2, not the original part that Roland used in the first keyboard assemblies part but is compatible with Type 2 set ups. If you had replaced the Type 1 flexi with a “fixed” Roland Type 2, you would have needed this “Orientation A” cable to make a Type 2 work.
Installation For Type 2
To use this with the Super Synth Projects keyboard PCB, the transition board connector needs to be installed in the Type 2 position and fit the cable as shown in picture below. Same convention follows for the blue identification area (non contact side). The inset picture shows what it looks like at the Mainboard connector, the side facing the edge of the PCB is non-contacting.

Comparison
Here is a picture of a damaged Type 1 cable (on left) with a SynthParts replacement Type 2 cable on right.

Since the start of 2023, Synth Parts also sell a Type 1 version on their website:
Copyright © 2023 Super Synth Projects, Guy Wilkinson & Project Sponsor Jonathan Williams

You must be logged in to post a comment.