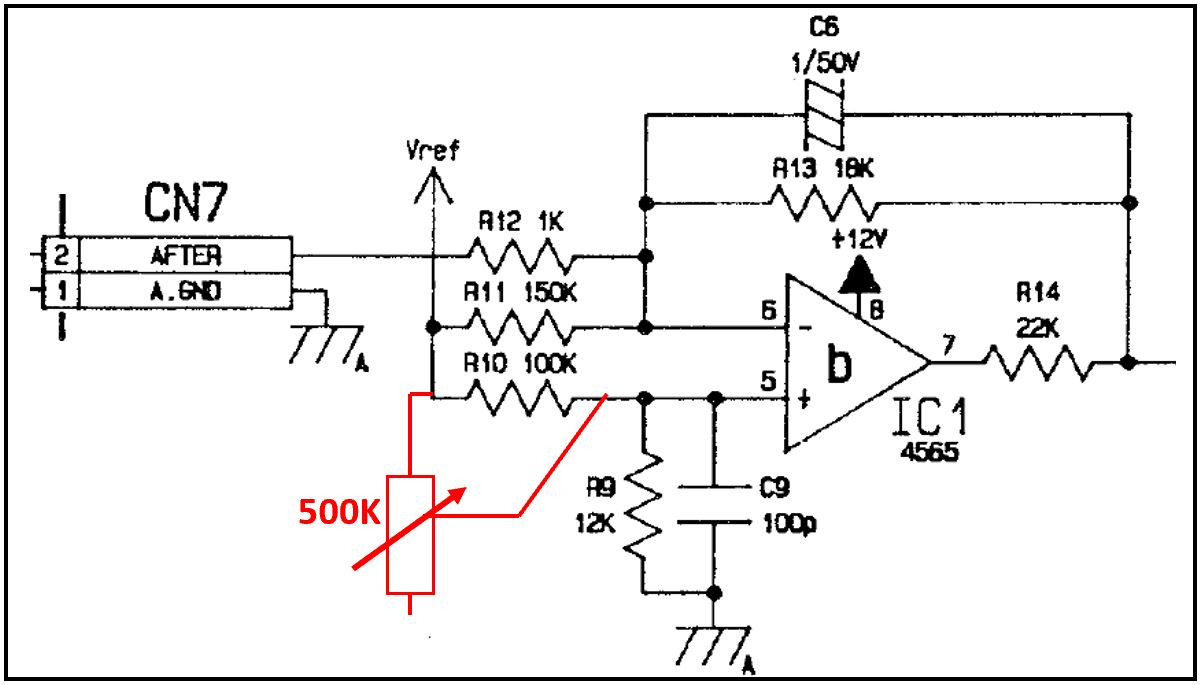
In most instruments, the aftertouch sensor does not respond as well as it was when new. The short modification guide below is based on something similar found on the JD-800 Center website. The circuit addition is shown below:
The following parts are needed:
- Multi-turn Potentiometer 500K, BOURNS 3266W-1-504LF (Farnell: 9352775)
- Heat shrink sleeve
- Cable tie & base
- 2 core 28 AWG zip wire (left over from IDC cable)
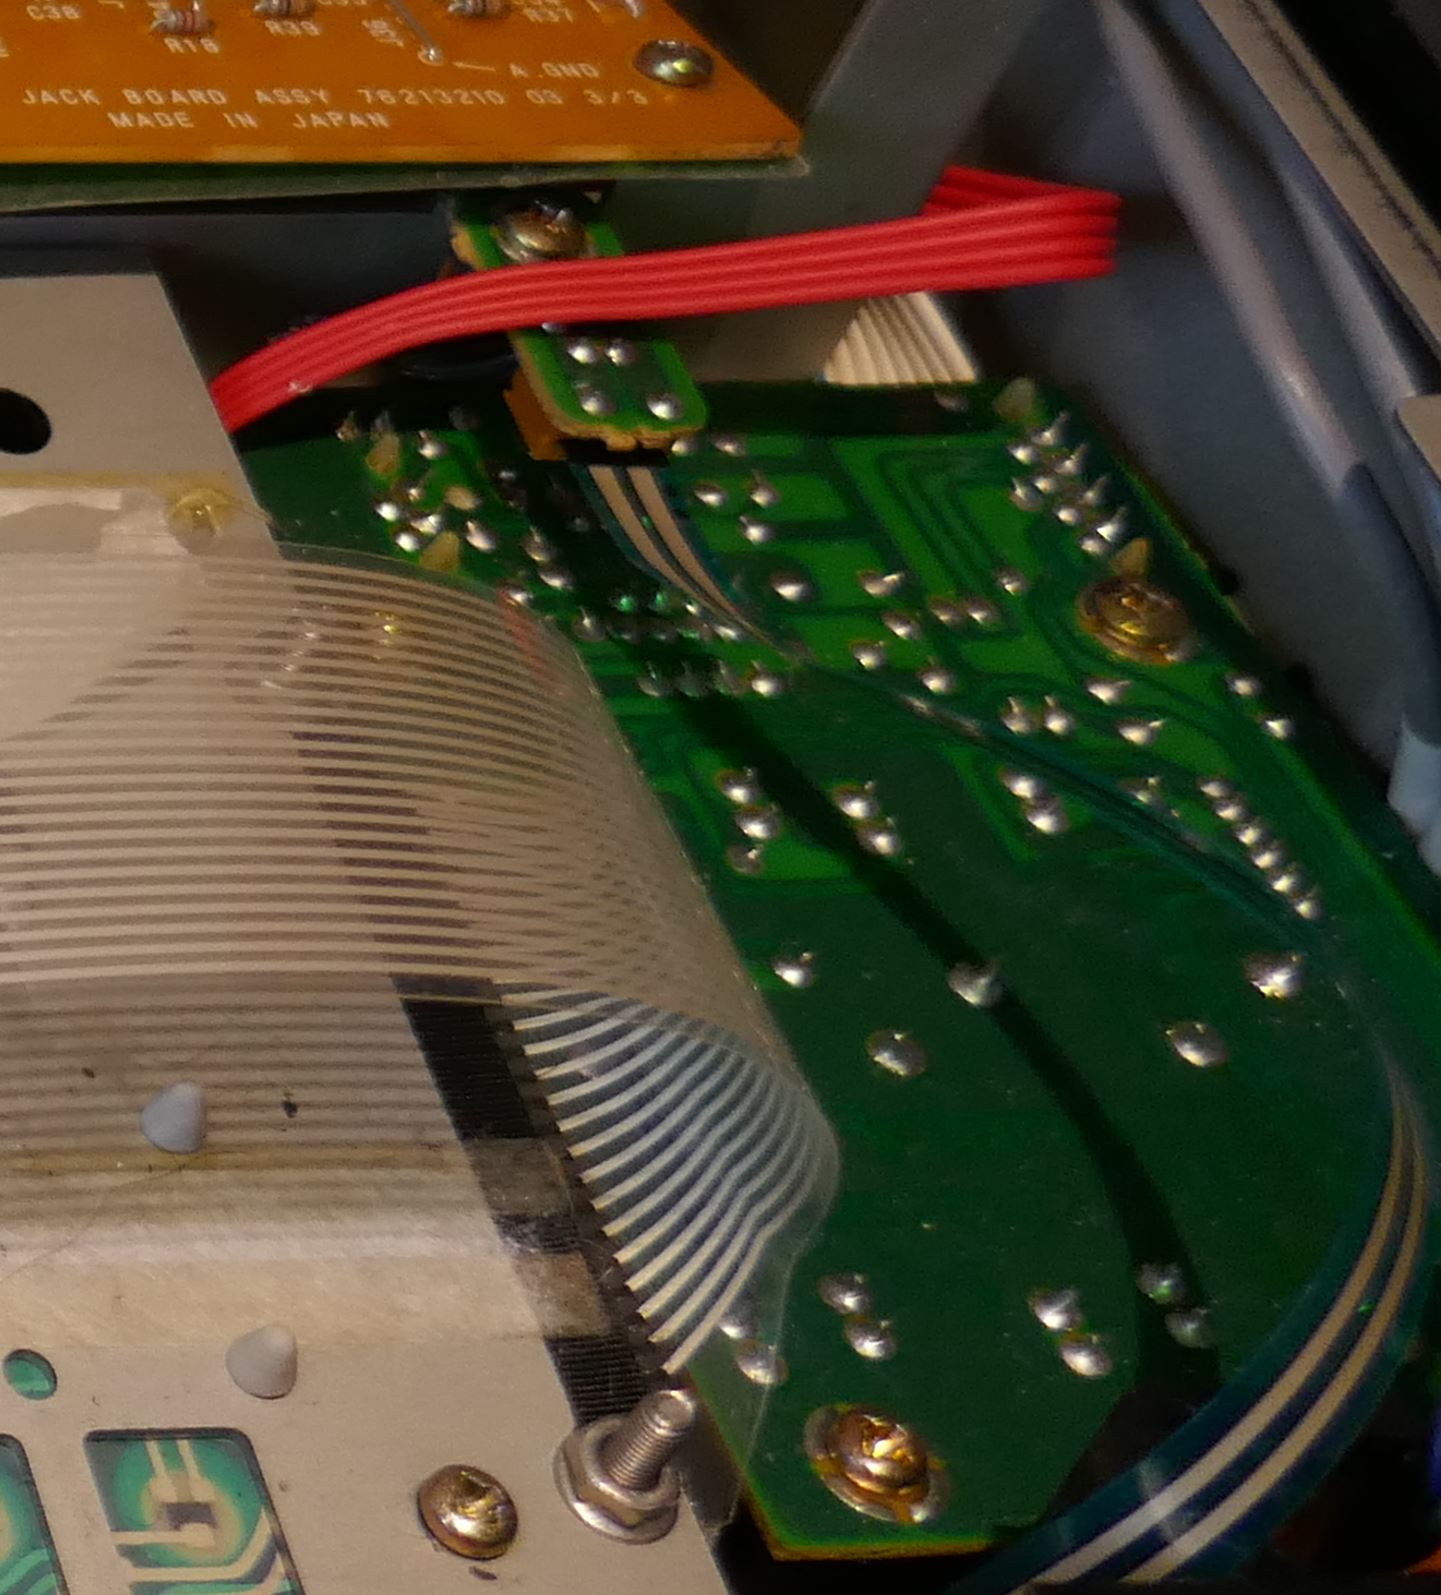
This modification can be undertaken without removing the keyboard assembly quite easily, as long as the aftertouch flexible cable is carefully removed and the little adapter PCB is moved off the bracket to gain access.
Trim Potentiometer Attachment
The wires are attached across the underside of R10. The opposite end attaches to the wiper and one end of the pot. The pictures below show connections that make the sensitivity increase when the pot is adjusted clockwise.
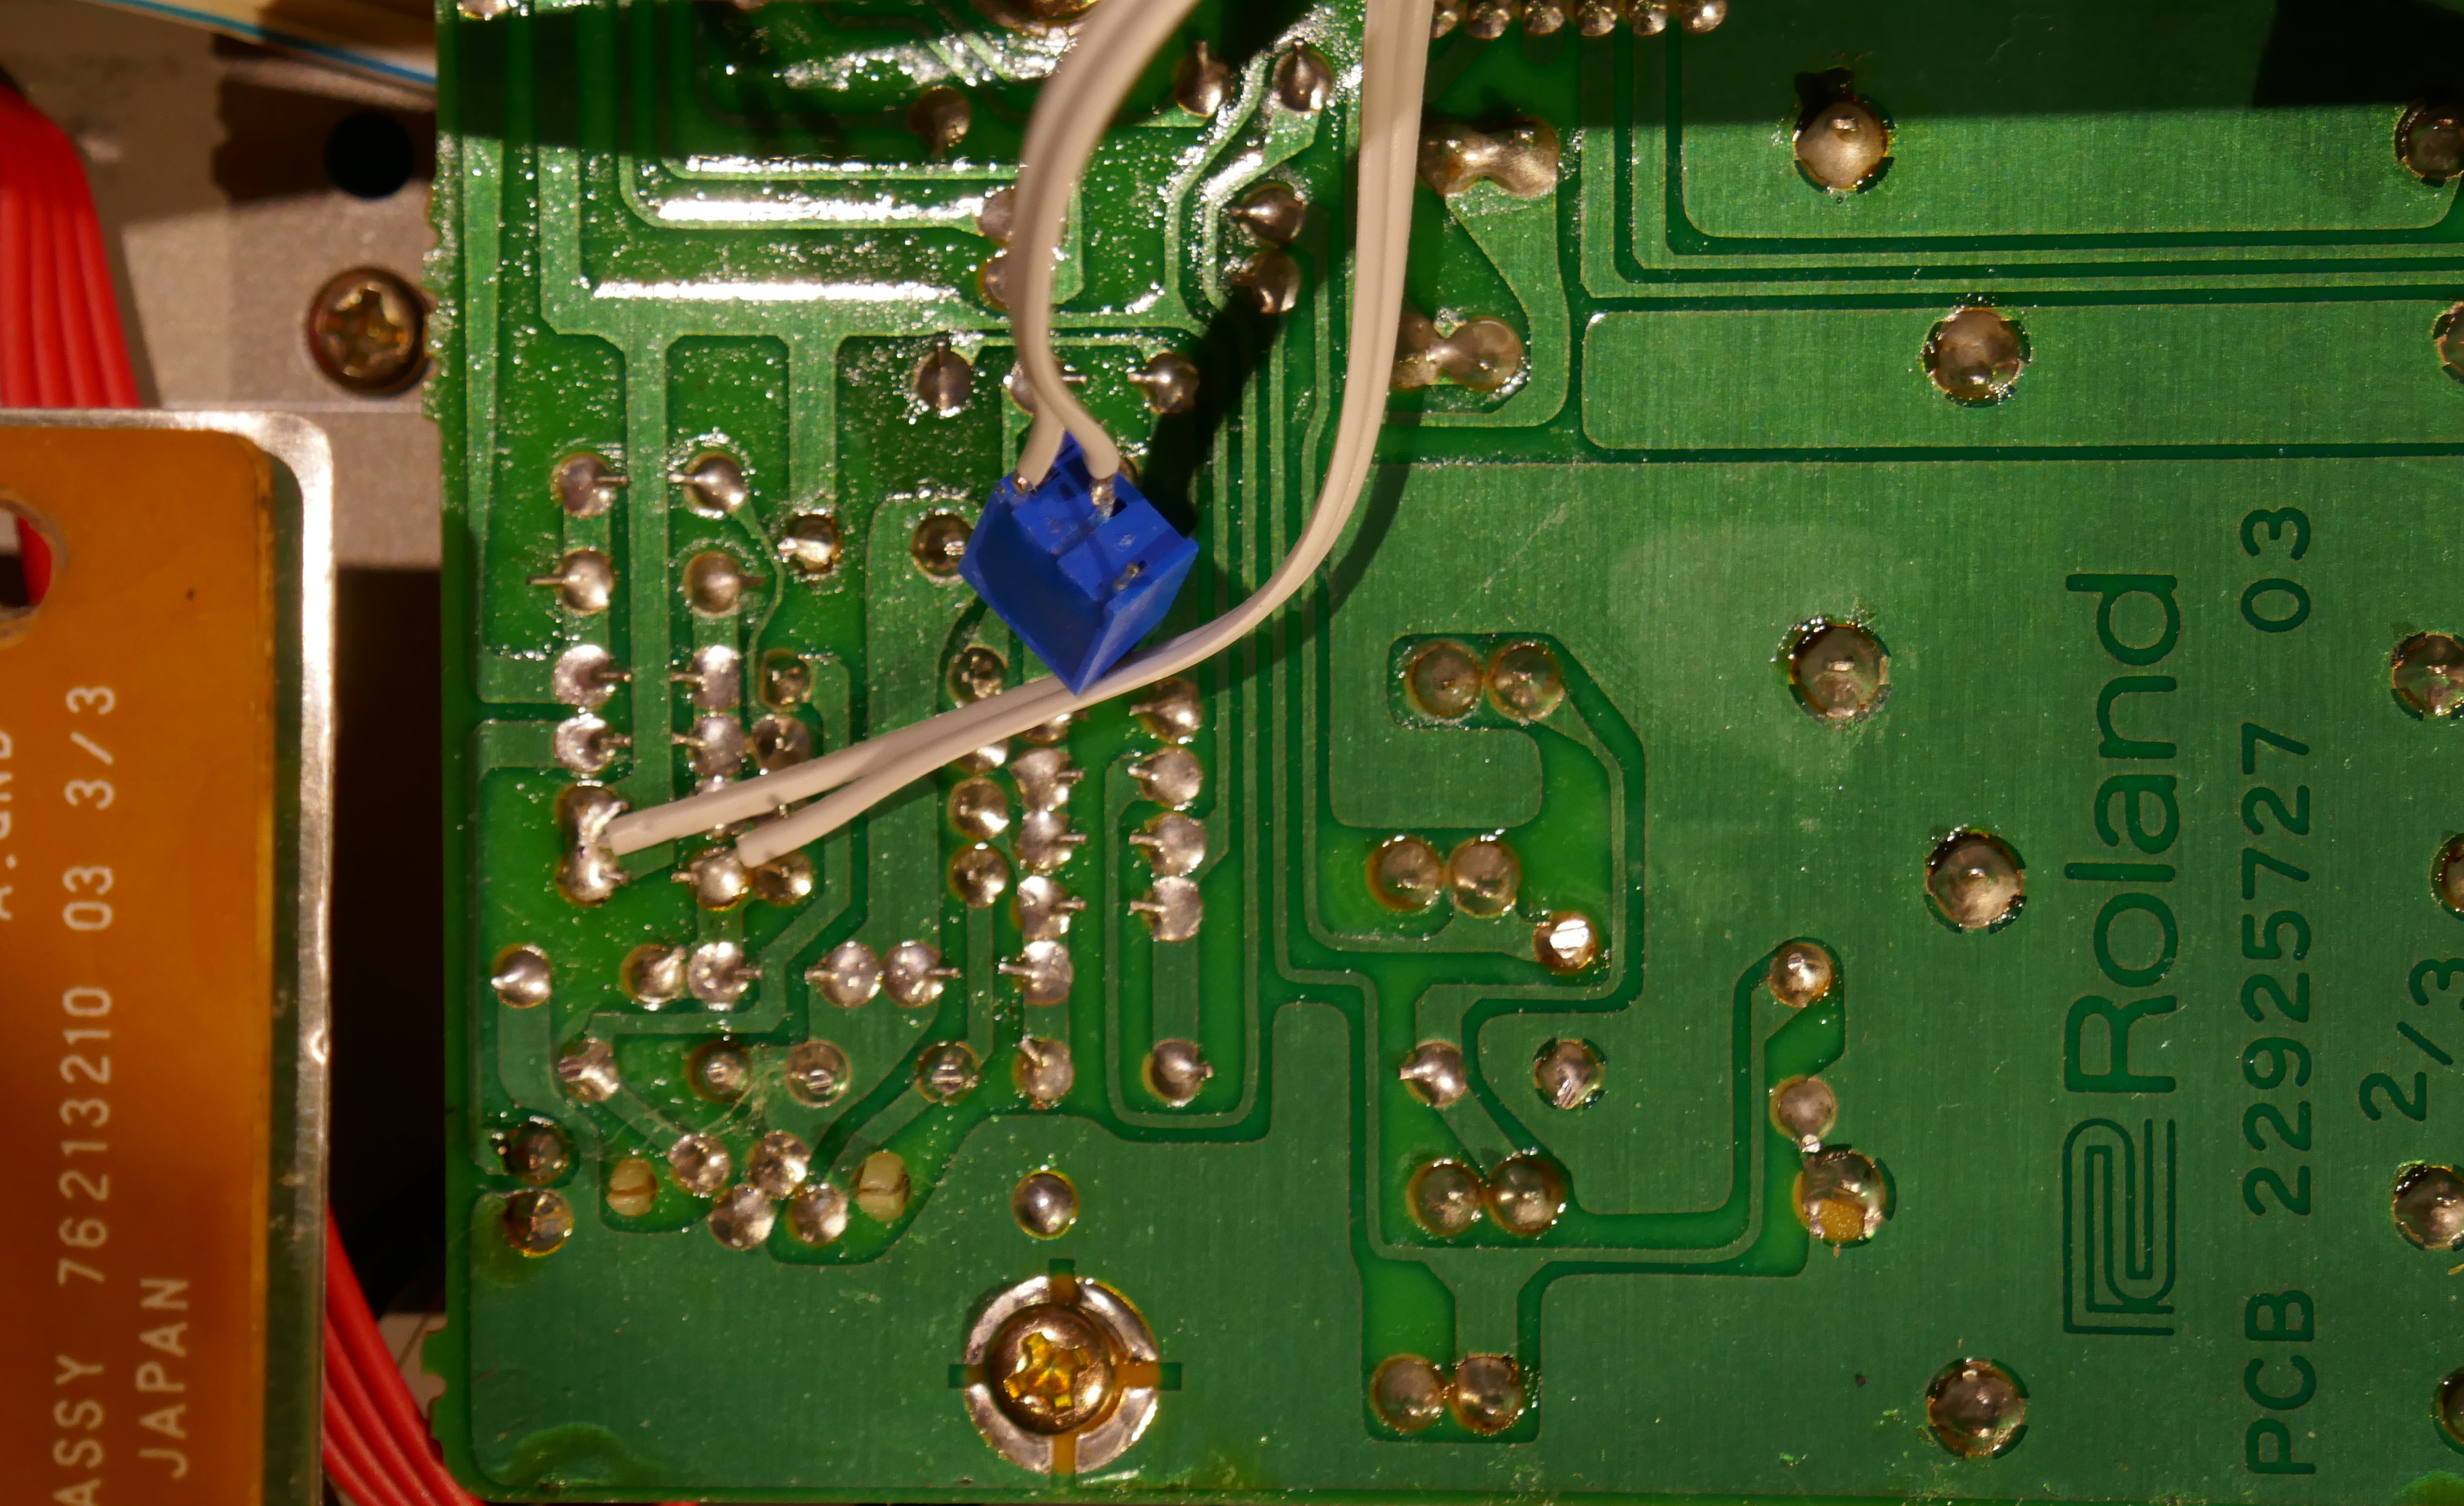
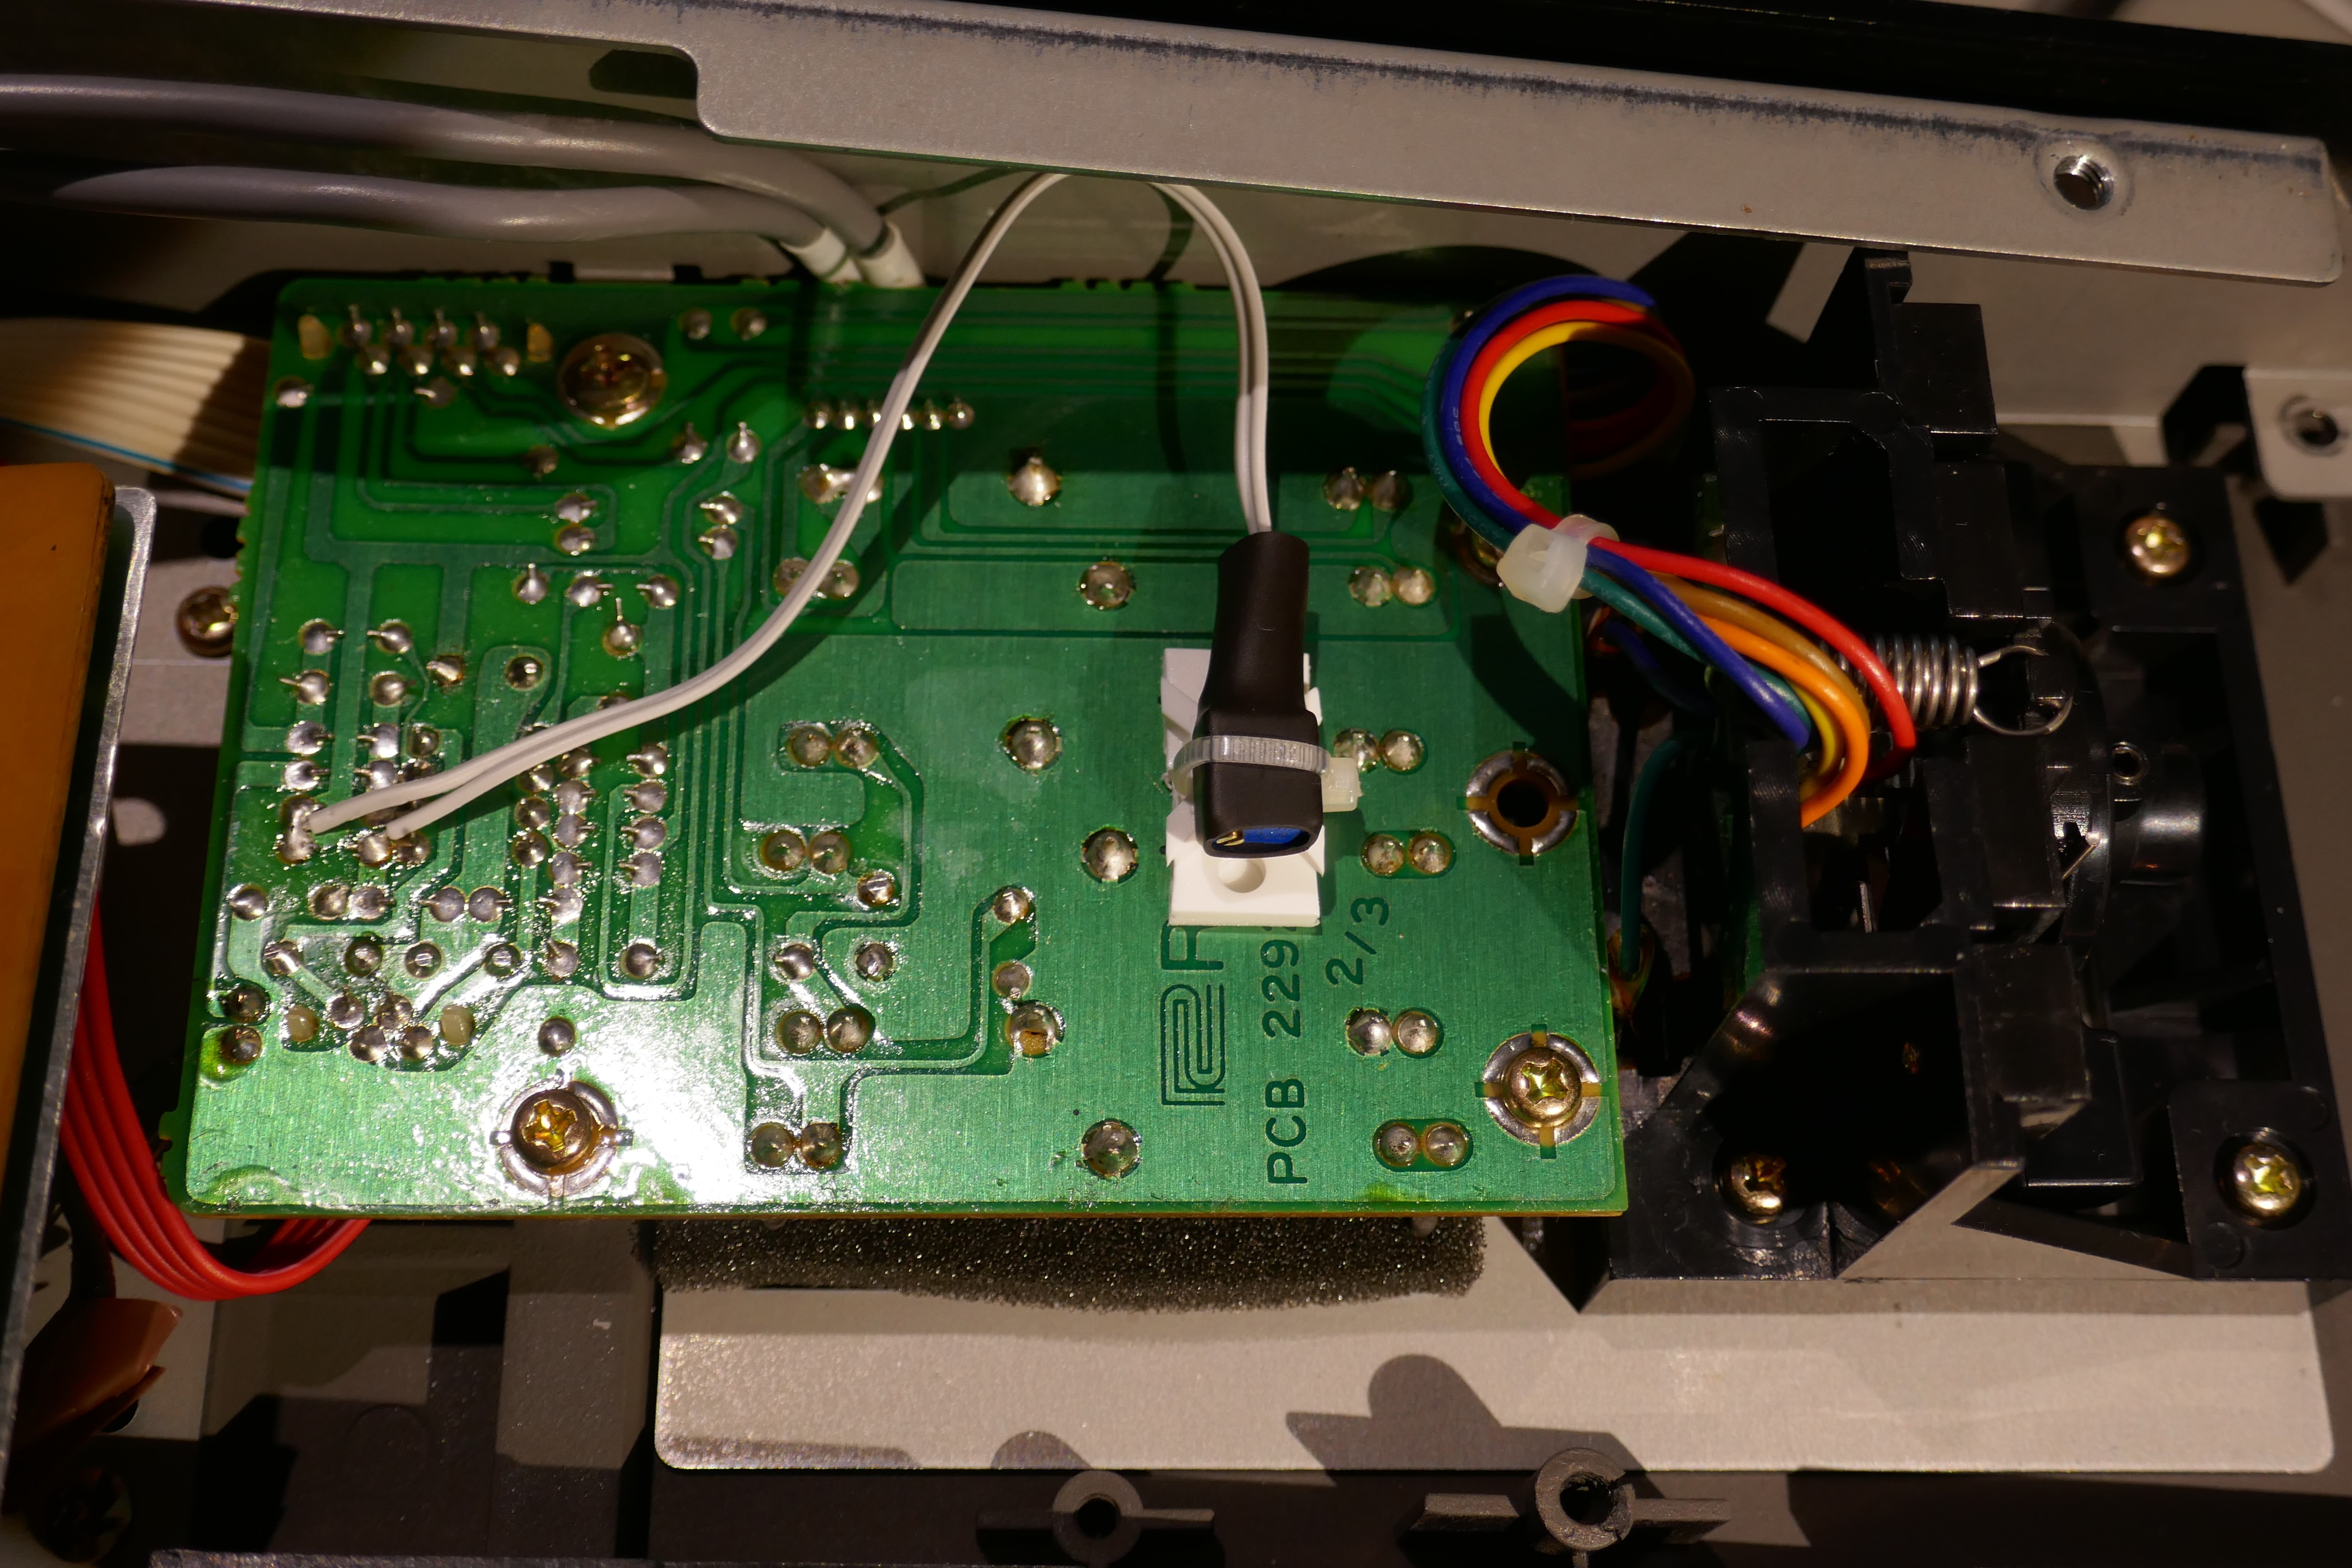
A cable tie base is trimmed so that it fits on the PCB in between solder connections. When adjustments need to be made, it can be removed and replaced easily with the keyboard in situ. In this case the keyboard assembly was not fitted during adjustment.
Special Note
Refit the Aftertouch connector and cable. Note that we had to clean the connector contacts with IPA otherwise the maximum value during test that could be achieved was 68. The socket was cleaned using a piece of card slightly wetted in IPA. This shows that some issues can be with the connector arrangement, not necessarily with adjustment or sensor itself. Be wary of rubbing the aftertouch carbon connection too much, only 1 or 2 wipes, as it will rub away very easily.
Test & Configuration
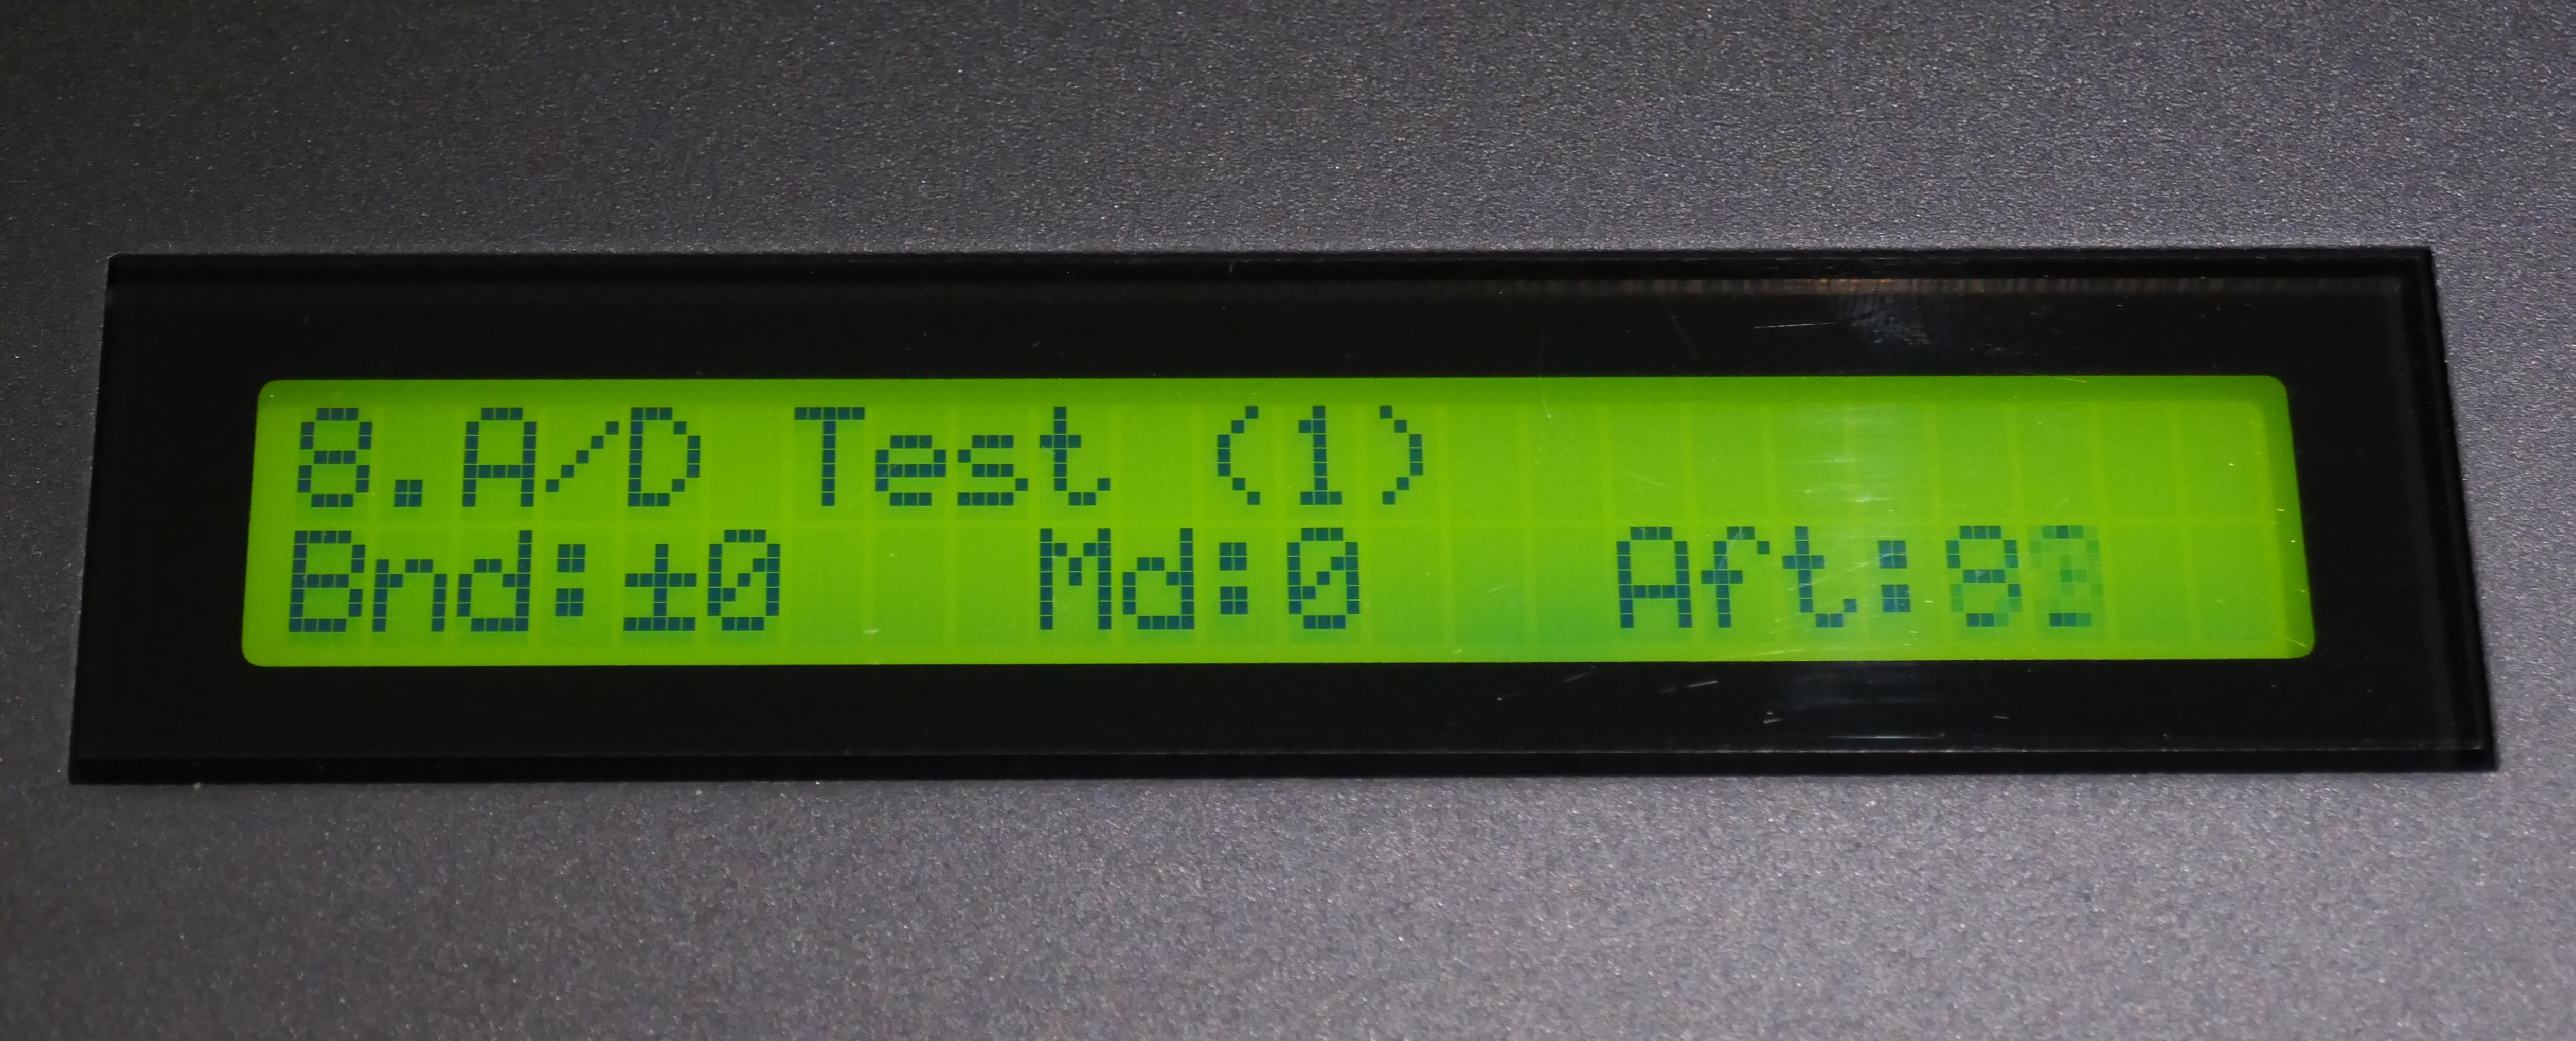
Access test mode by the following key commands: select ROM play then hold “mark” and “jump” whilst pressing “enter”. Access A/D test by holding “jump” whilst pressing “Bank 8” and the display in picture below appears.
Adjust the sensitivity on the potentiometer to taste by pressing a key and observing the aftertouch value, the maximum value is 127. Test with a number of keys pressed together too. The way that the sensor works is that when more keys are pressed, the more sensitive it becomes.
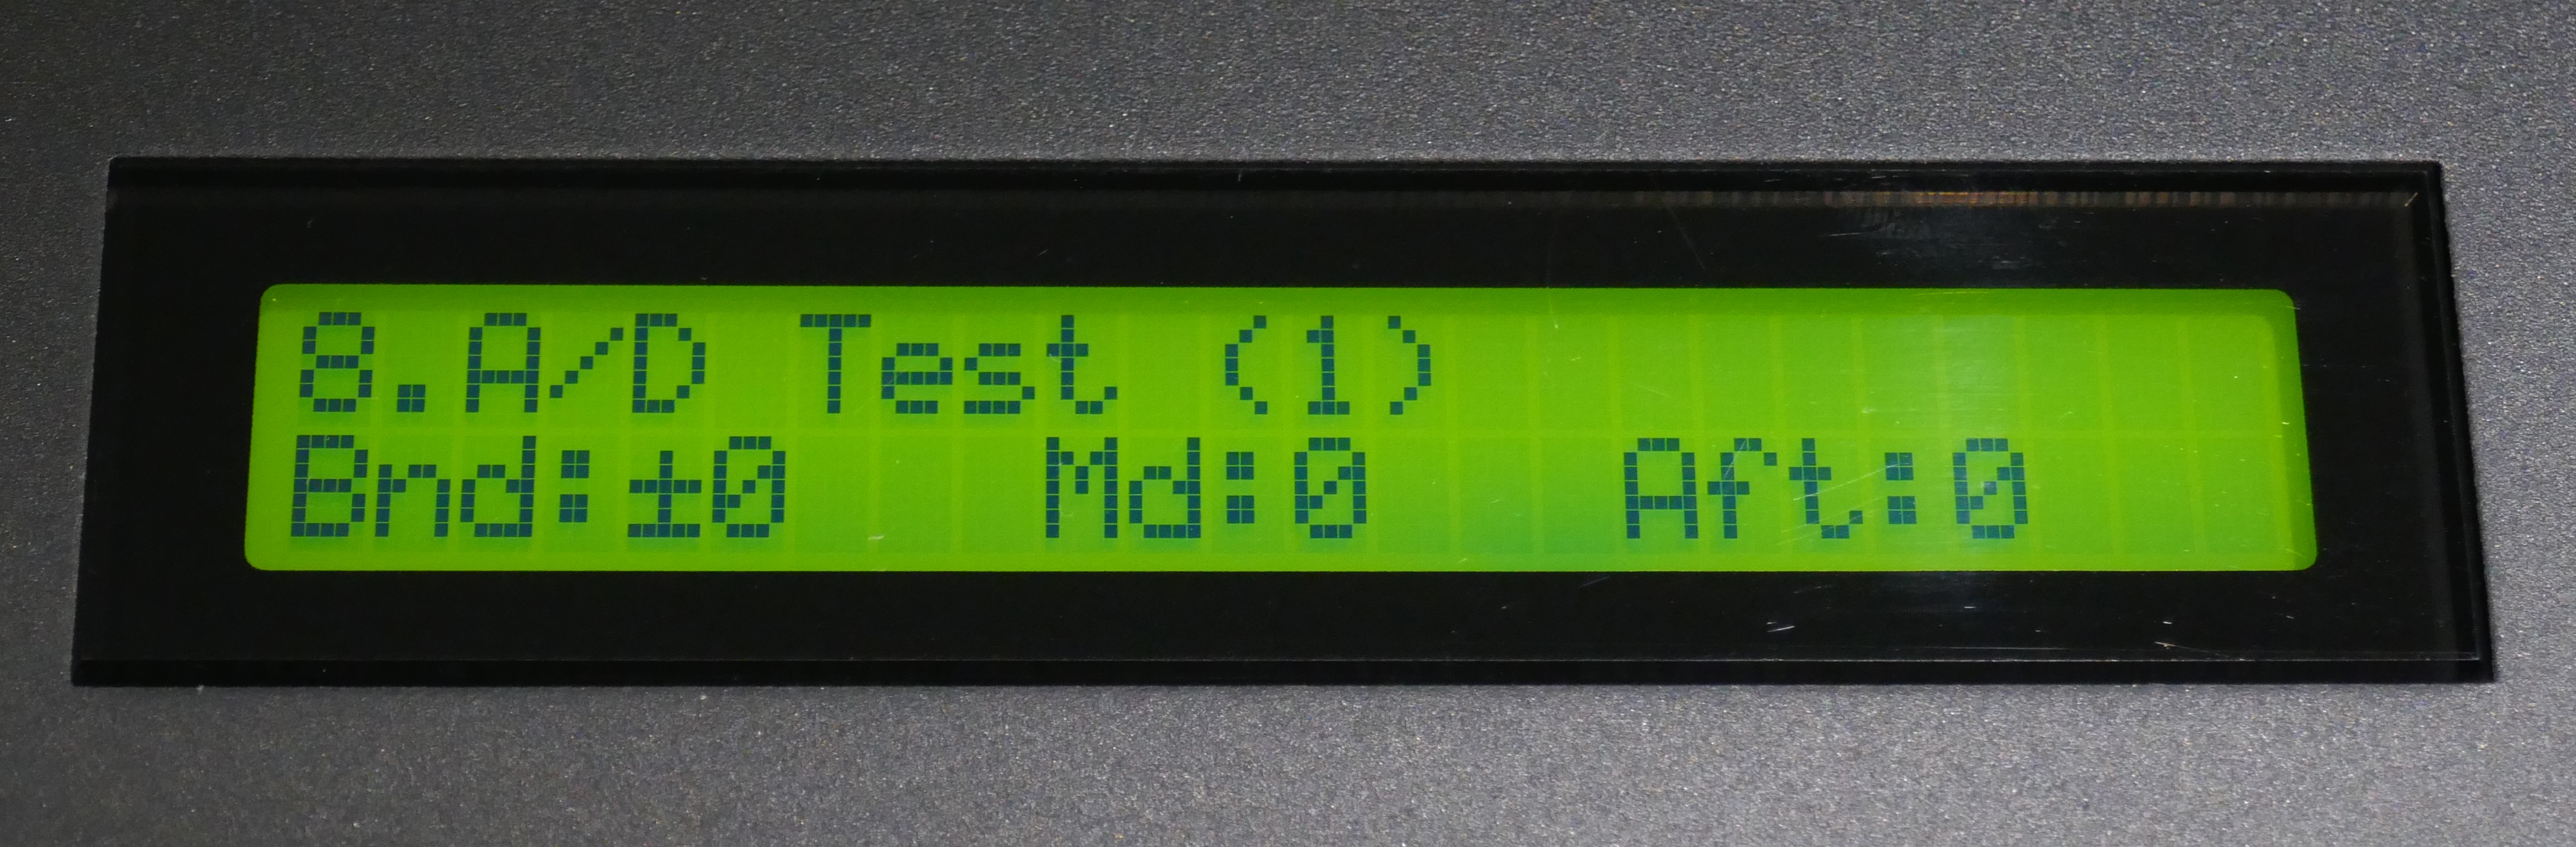
Release the keys and confirm that “Aft:0” is shown on the display, if not then the aftertouch sensitivity is set too high and set up needs to be repeated. Generating continuous Aft messages is not useful and some dead-band prevents unnecessary signals when it isn’t wanted.
Copyright © 2021 Super Synth Projects, Guy Wilkinson

You must be logged in to post a comment.